Setup Guide
This guide walks through installing all three components of the Address Book app: the Checkout & Customer Account Extensions, the Admin Block, and the Theme Extension.
Written By Fatima Faisal
Last updated 5 days ago
Prerequisites
Before you continue, ensure that:
The Extend B2B Address Book app is installed and pinned in Shopify Admin.
Shopify B2B features are enabled.
You have admin access to manage:
Company locations
Customer accounts
App extensions
Enable Multiple Shipping Addresses Per Location
To allow customers to use multiple shipping addresses per location, this must be enabled in that company's or location's settings:
Go to Shopify Admin → Customers → Companies.
In the right-hand column, look for Customizations.
Click the pencil icon next to Checkout.
Check "Allow customers to ship to one-time address."
Step 1: Install Checkout & Customer Account Extensions
This step adds two blocks:
Address Selector – shown on the Checkout page
Address Management – shown on the Customer Account page
From the app's setup screen, find the Checkout & Customer Account Extensions section and click Install Checkout Extensions.
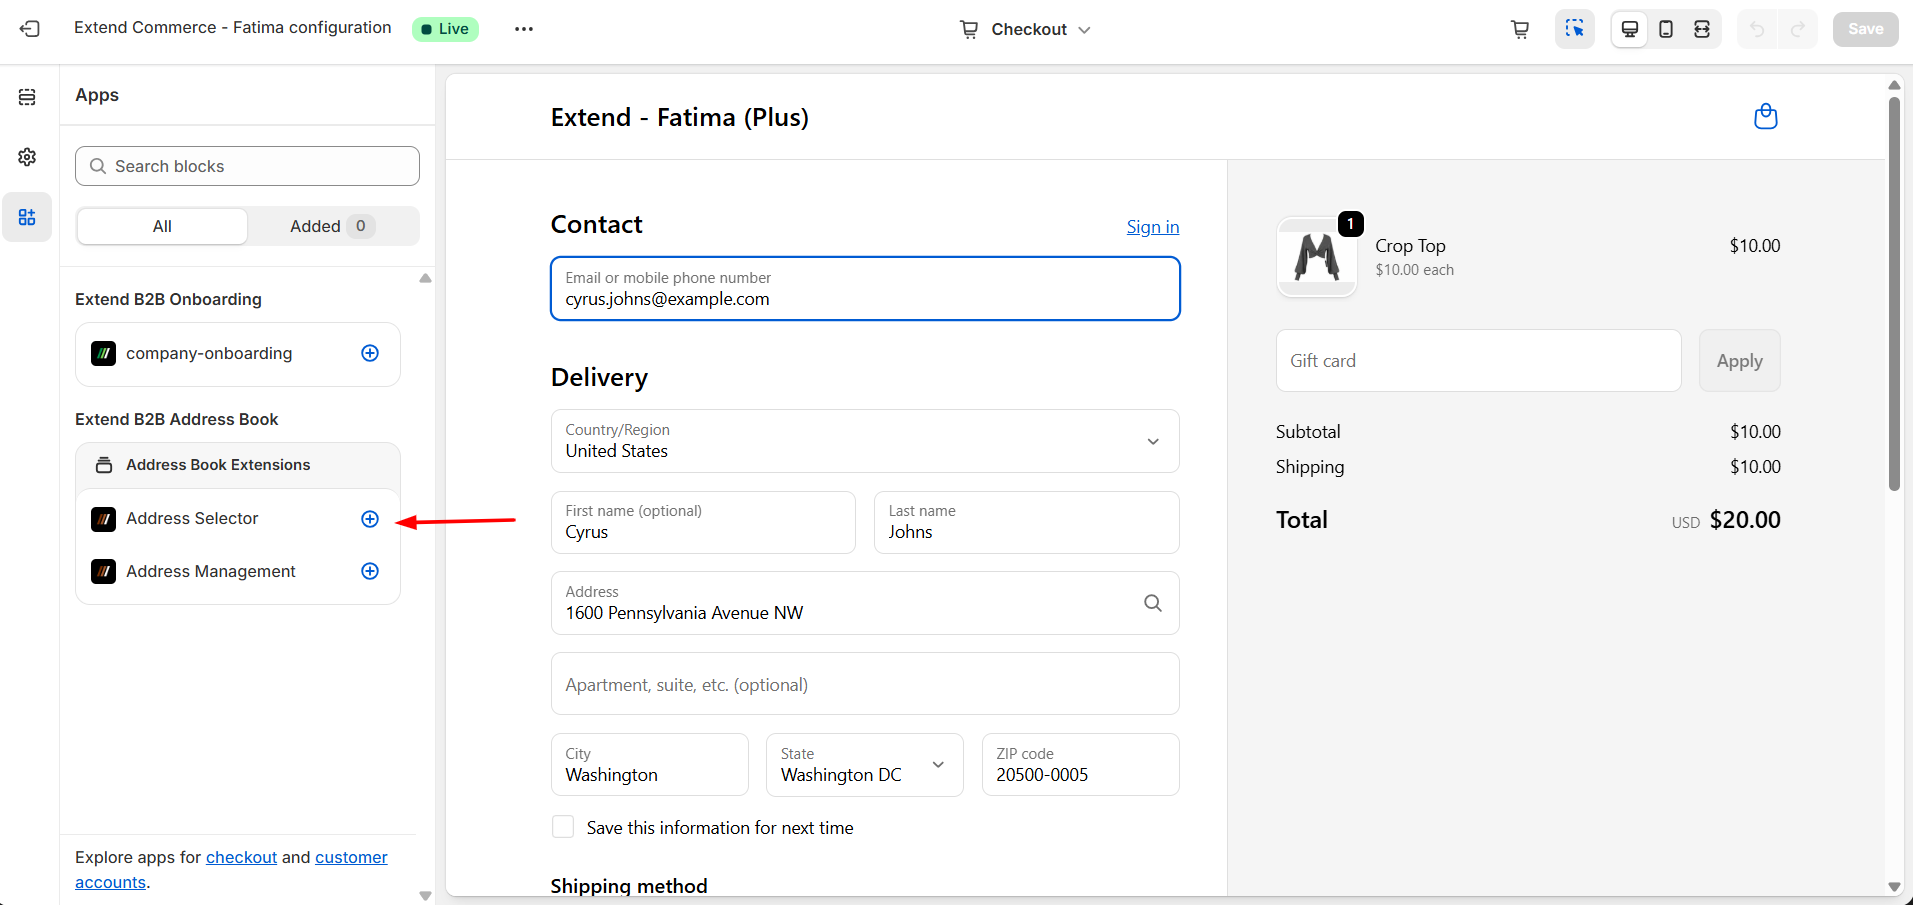
This opens the Apps panel on the left side of the editor. Under Extend B2B Address Book → Address Book Extensions, you'll see two blocks: Address Selector and Address Management.
Click the + icon next to Address Selector.
In the Add to popup that appears, select Checkout. This adds the Address Selector block to the checkout flow.
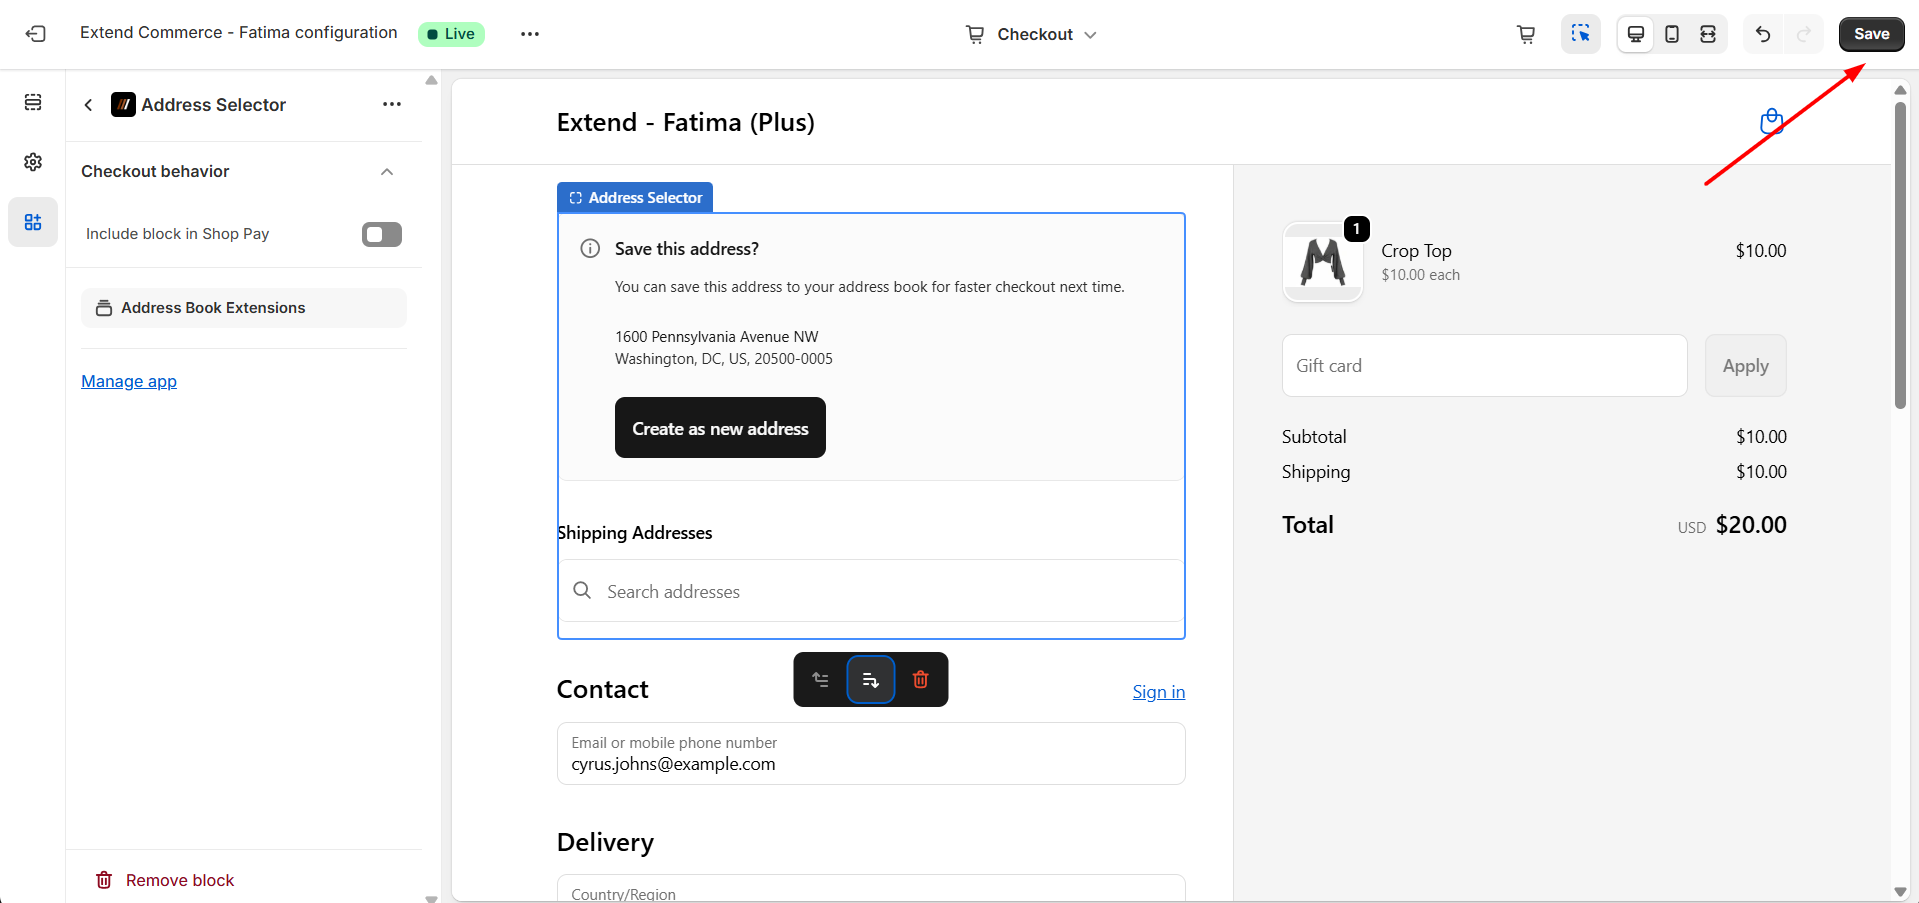
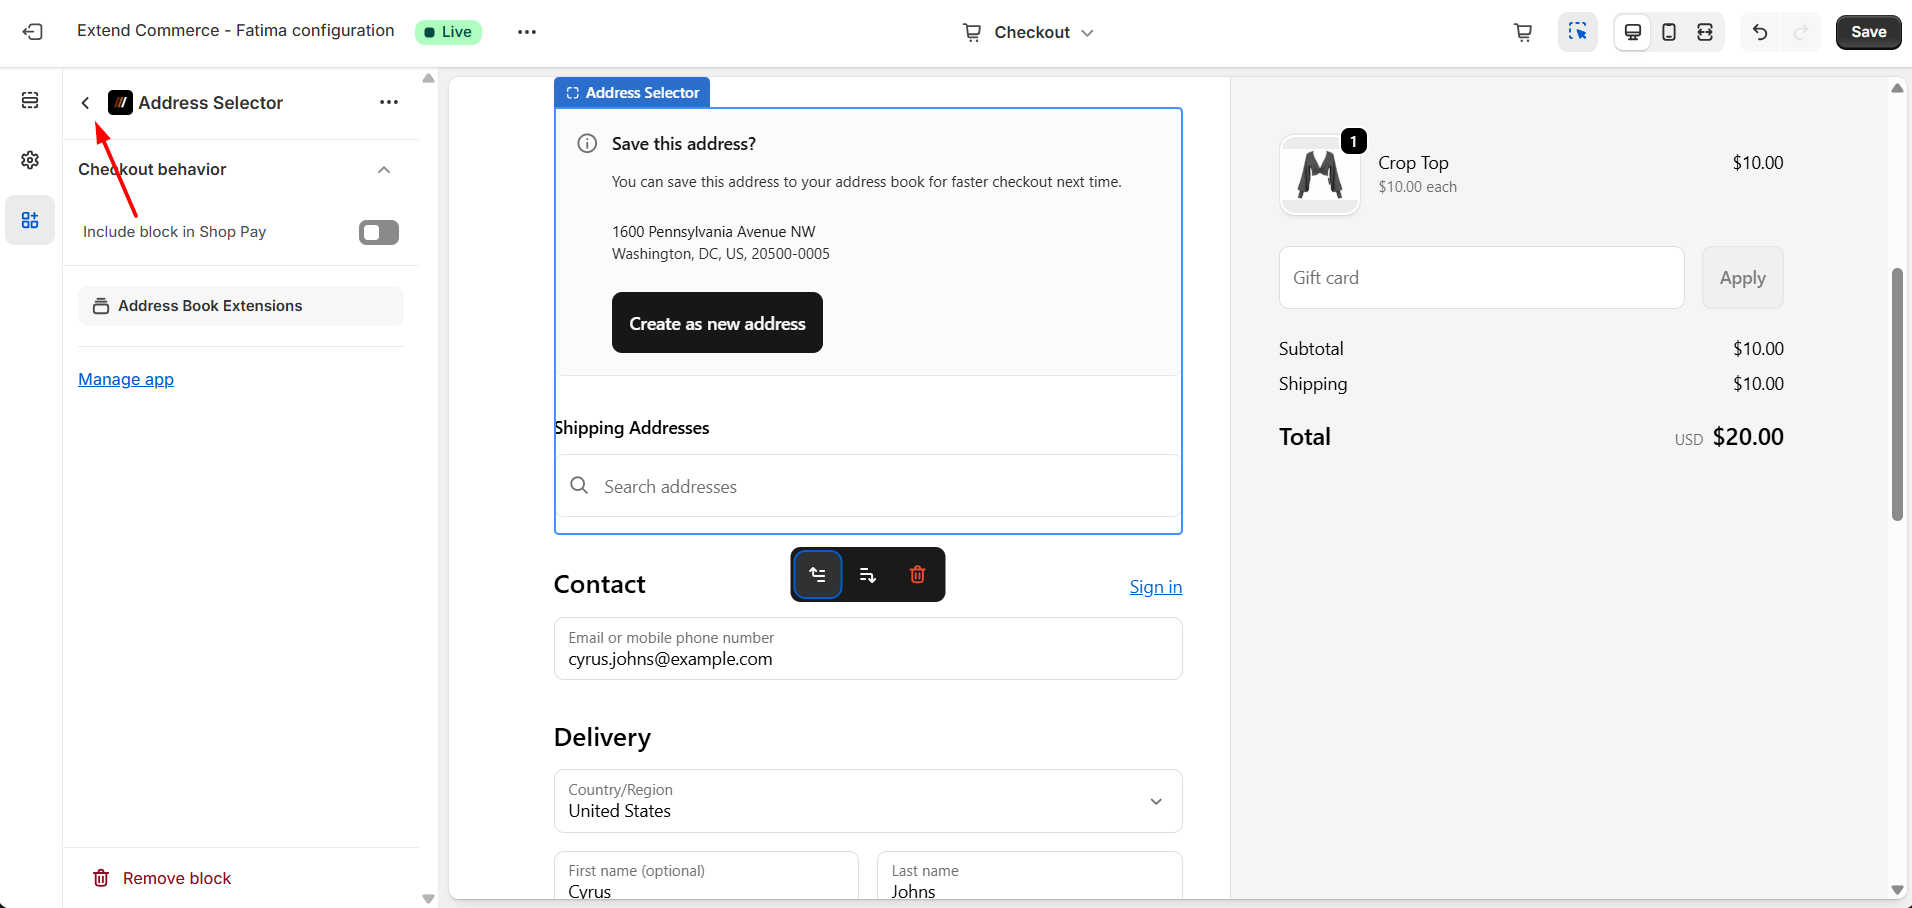
This enables customers to select and edit saved addresses during checkout.
Click the + icon next to Address Management.
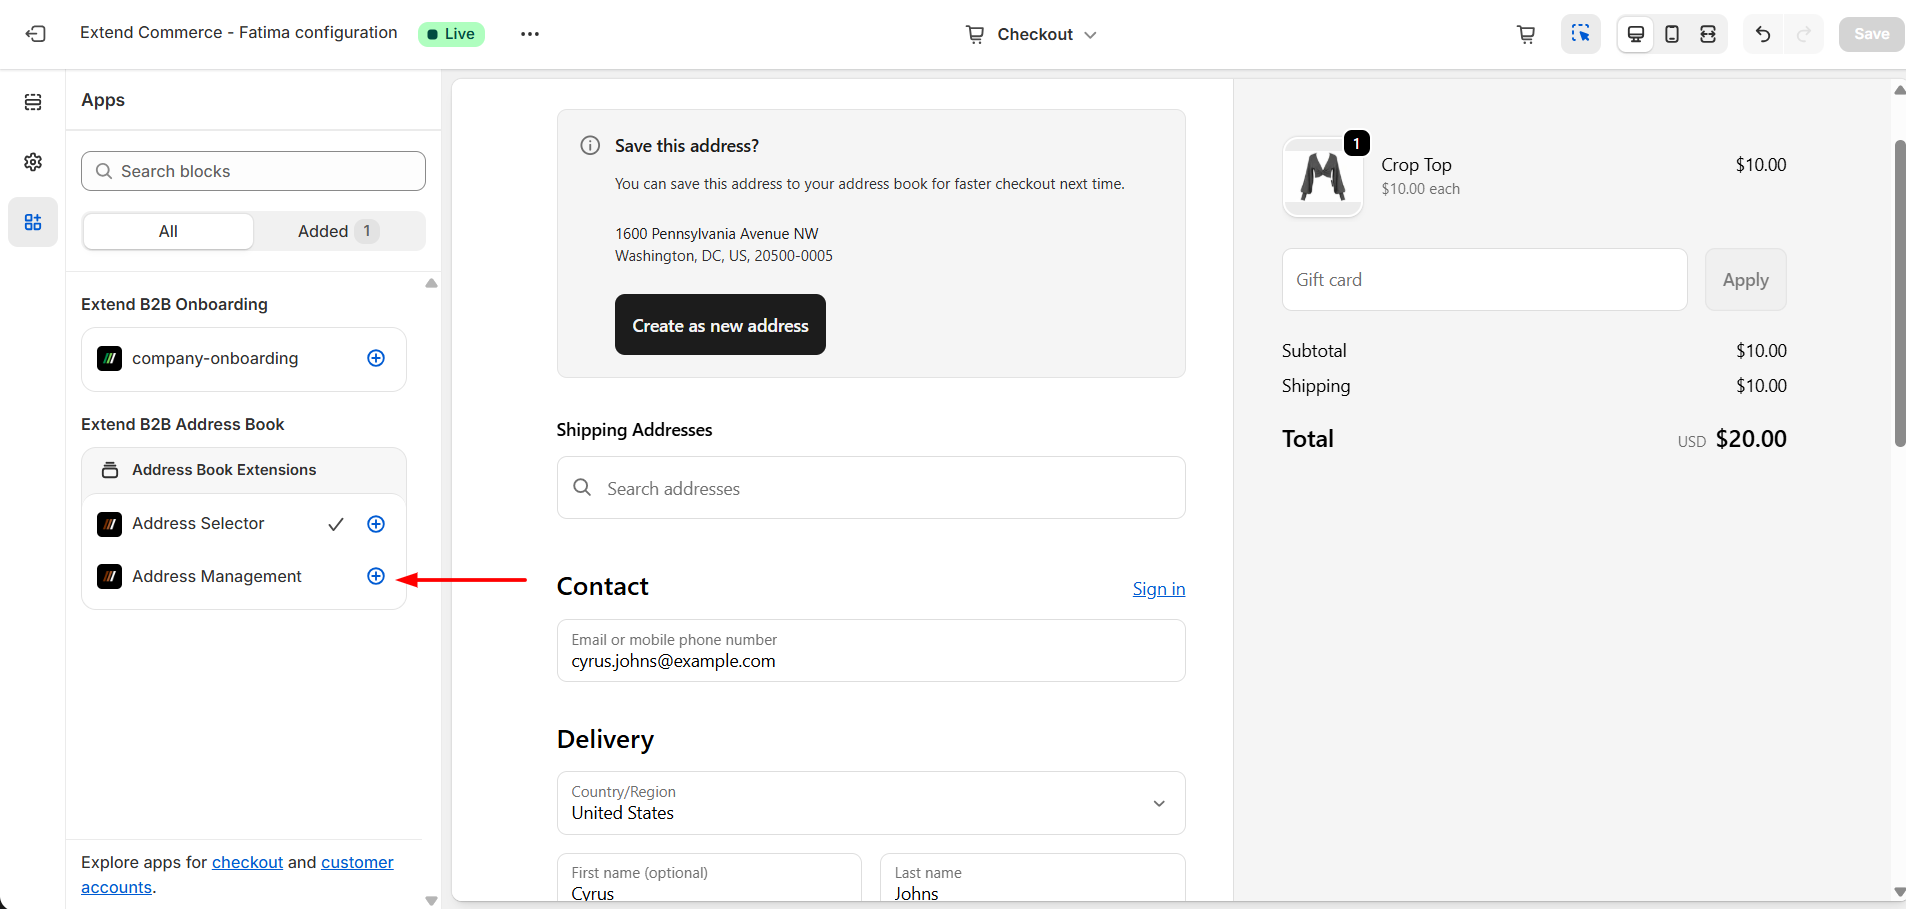
In the Add page to popup that appears, select Accounts. This adds the Address Management block to the customer account page.
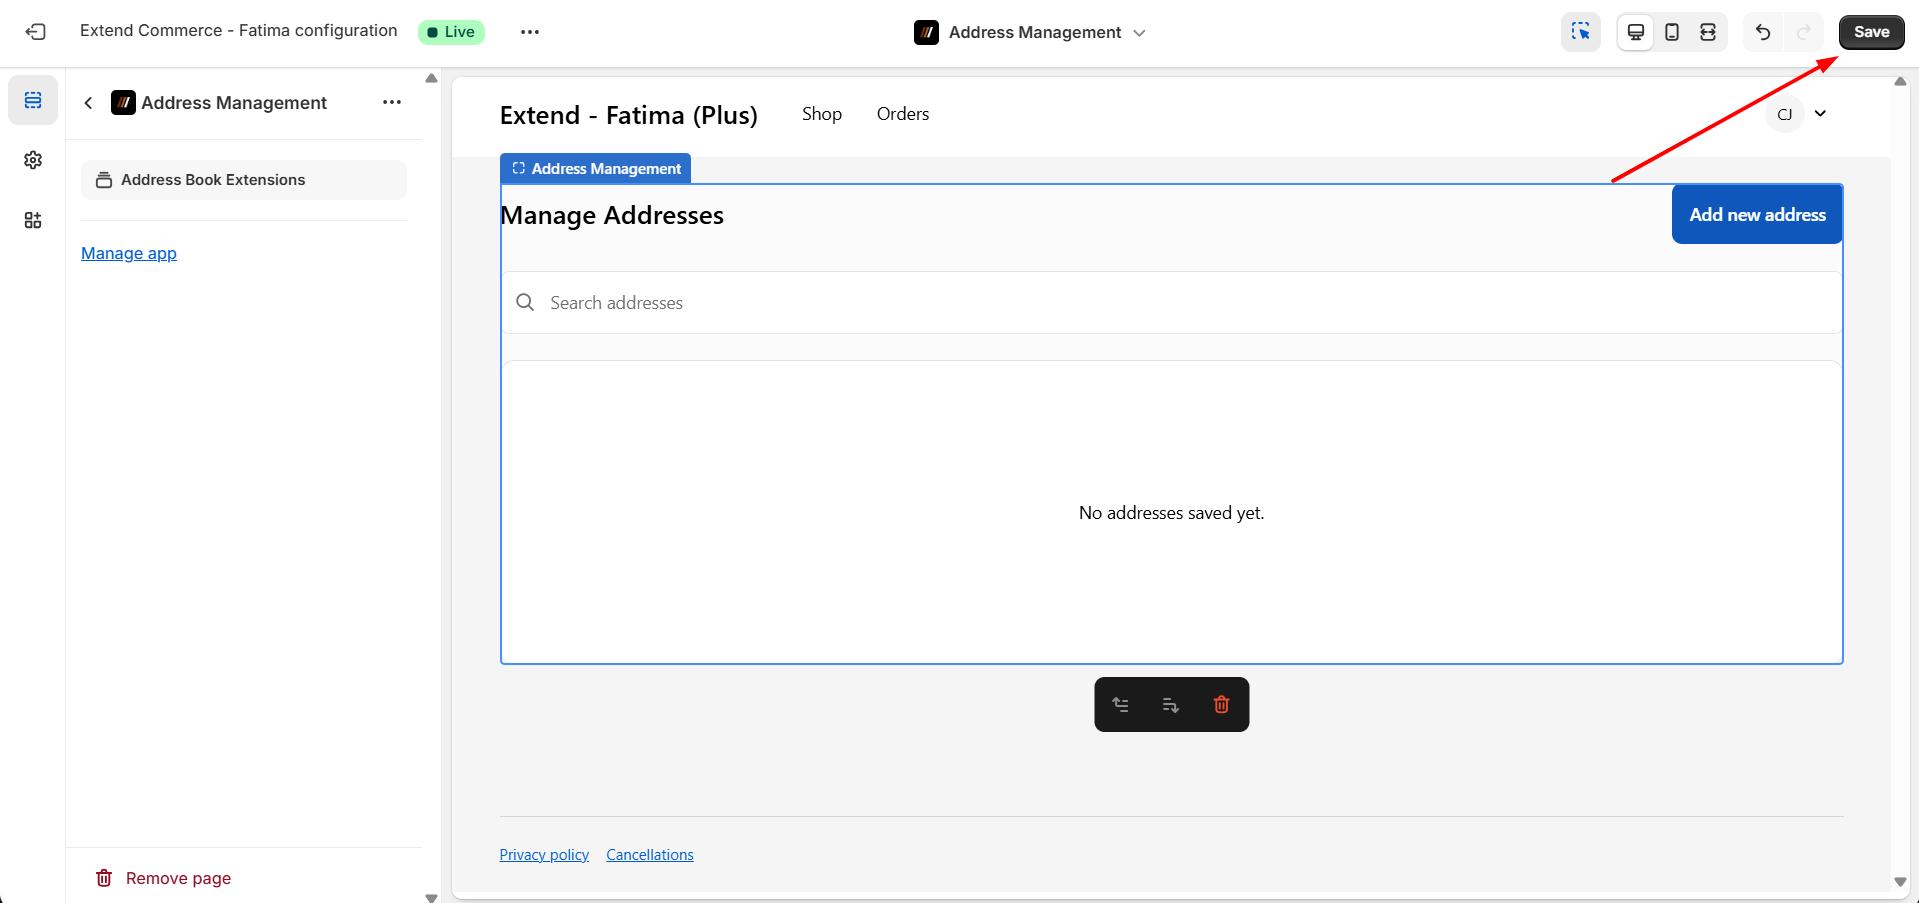
This enables customers to add, edit, and delete shipment addresses from their customer account.
Step 2: Install Admin Block
This step adds the Additional Addresses block to the Admin's Company Location Details page.
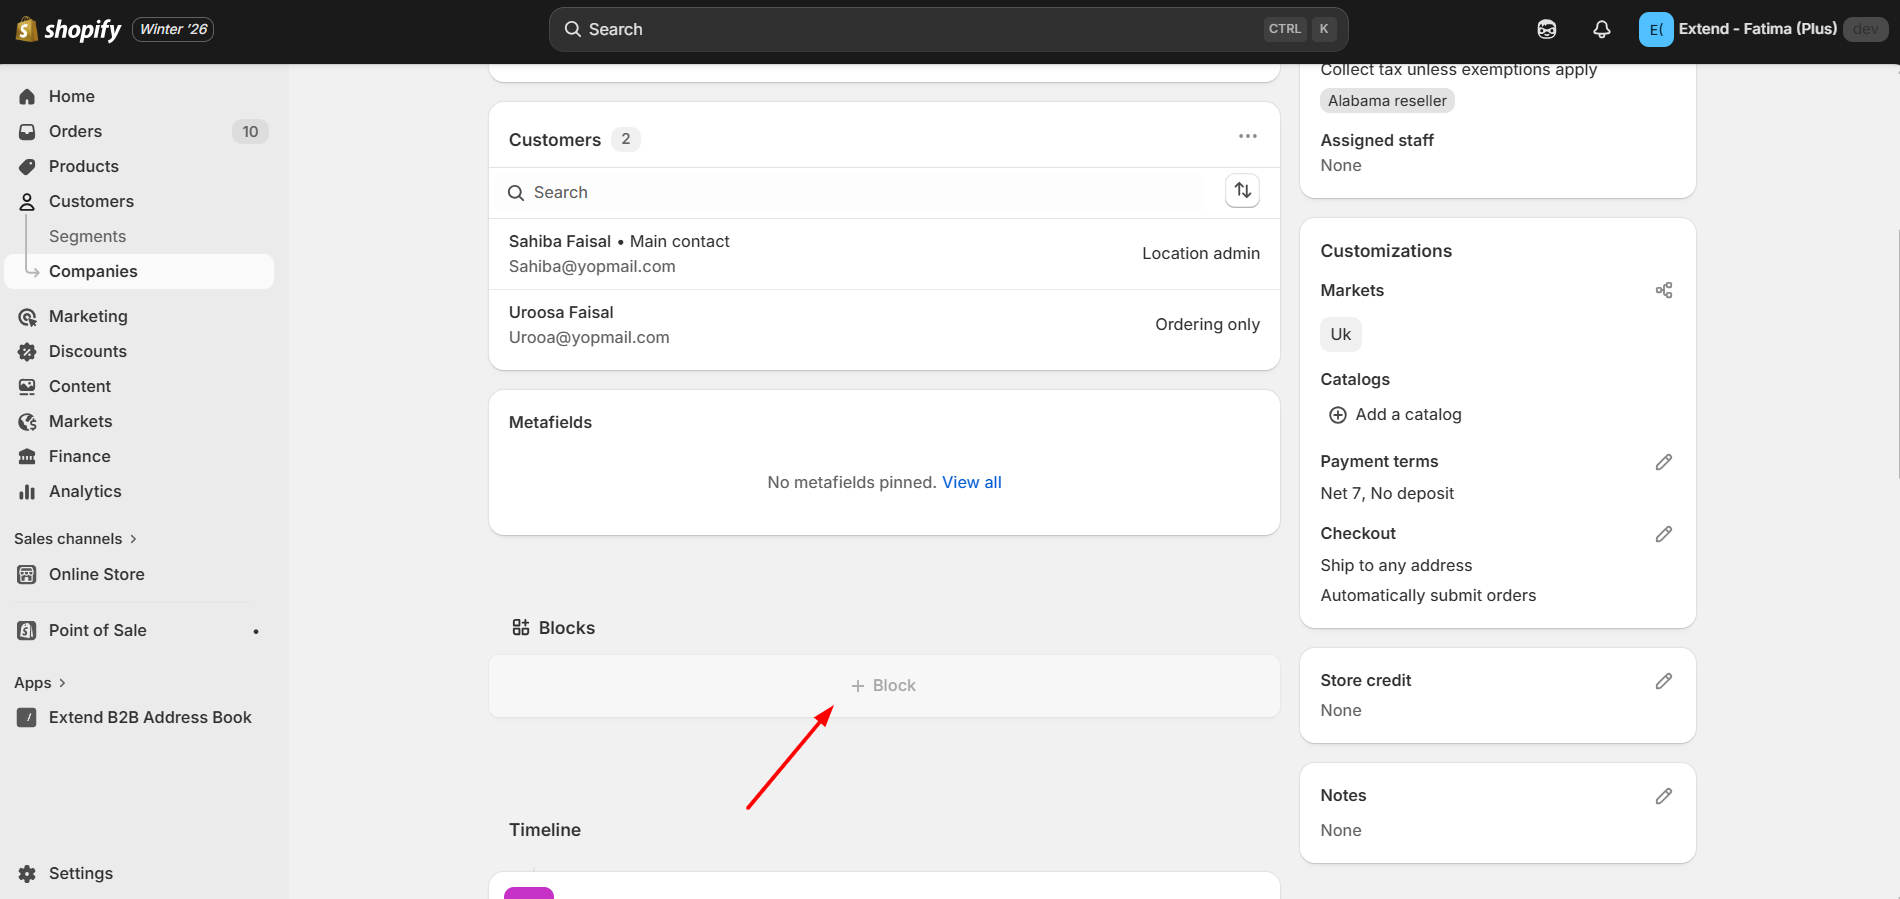
Back on the setup screen, go to the Admin Block section and click Install Admin Block.
This opens the Blocks panel, where you'll see Additional Addresses Block already added/selected.
Confirm it appears in the block list (you can add further blocks here using + Block if needed).
Step 3: Install Theme Extension (For DTC customers only)
This step adds the Address Selector block to the Online Store's Cart page. This step only applies to DTC (direct-to-consumer) storefronts.
On the setup screen, go to the Theme Extension section and click Install Theme Extension.
This opens the theme editor. In the left-hand panel, navigate to the Cart section and expand Apps.
Click Add block, then select Address Selector to add it to the cart page.
Once added, the Shipping Address section will appear on the live cart/checkout preview, allowing customers to select from saved addresses (e.g., "Acme Inc." or "456 Elm St") or search for a new one.
Click Save in the top-right corner to publish the change.
Step 4: Add Address Management to the Customer Account Menu
Before customers can manage addresses, an admin must add an Address Management link to the Customer Account menu.
Log in to Shopify Admin.
Go to Content.
Select Menus.
Open the menu used for the Customer Account.
Click Add menu item.
Enter a Label name (for example: Address Management).
Click the Link input field.
Select Address Management.
Click Save.